 12599
12599
Creating a new website form
1. Log into your MyGuestlist account
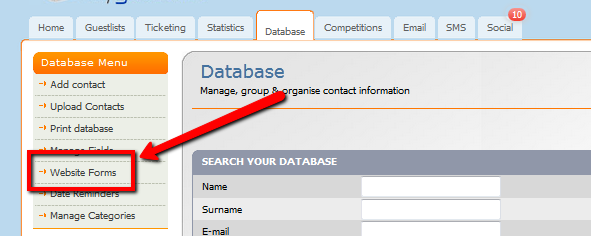
2. Click on the Database tab

3. Click on Website Forms

4. Click on Create Form in the top right corner

5. Name your new form, then click Next

6. Select which elements you would like included in your form by dragging the option from the left side to the right side, then click Next.
You can add or remove these fields later on.

7. Select the layout you would like and create the form, name your Submit button and Click Create My Form!

You'll now see the form edit screen.
To make a field required, click on the name

Tick the required box, and click Update.

This is necessary as email and/or phone must be required because without one, the person cannot be added to the database.
A required field will have a * next to the name.
You can also add or remove fields from your database into the form, or create custom fields that won't be added to the database.

Just click on the field to add it to the form.
|
If you want to add a new field but it's not on the list, you'll need to add it to 'Manage Fields' first.
If the field is already in the form, it will let you know. |
Use these fields if you don't want the data to go into your database.
These are good for function enquiries or competitions. |
This allows you to change the name of the form, the button text and the alignment.
|
 |
|
|
Once you have set your form up, Click Save and close.
Now what do I do?
Get the code and put it on your website!


